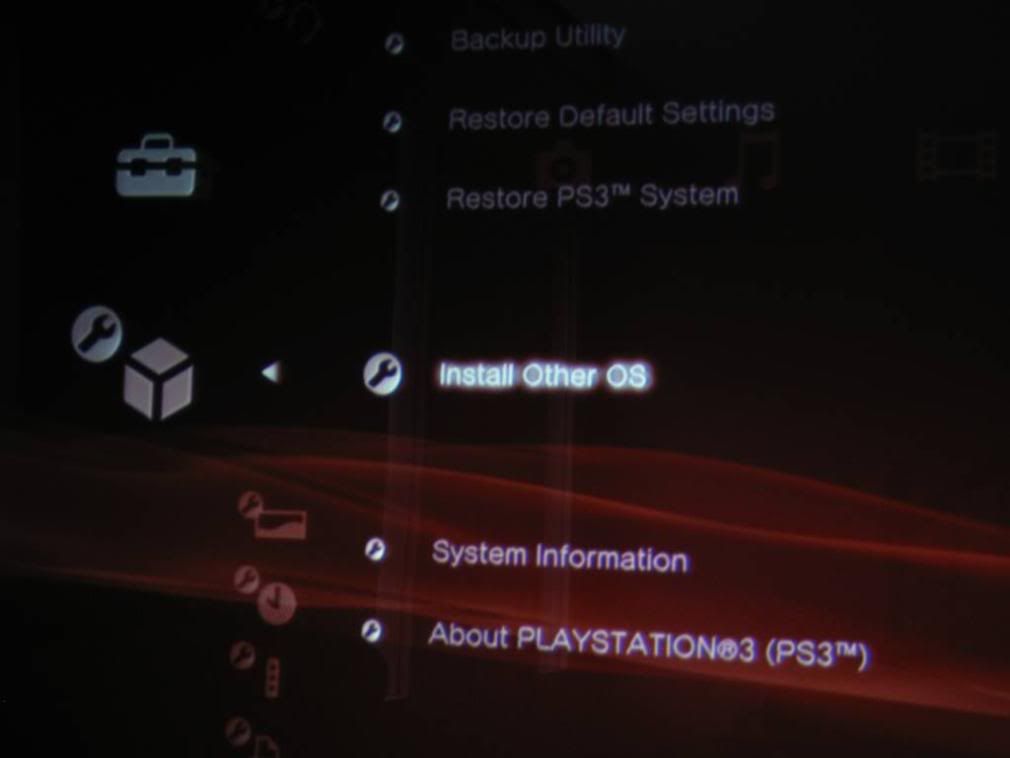
One of the cool features of the PS3 is that it is a serious computing device and Sony provided the option to easily upgrade its hard drive as well as install an alternate OS. So I did both.
By far, the easiest HDD upgrade known to man (presently). Simply remove a panel and a screw. Slide out the old HDD and slide in the new one.
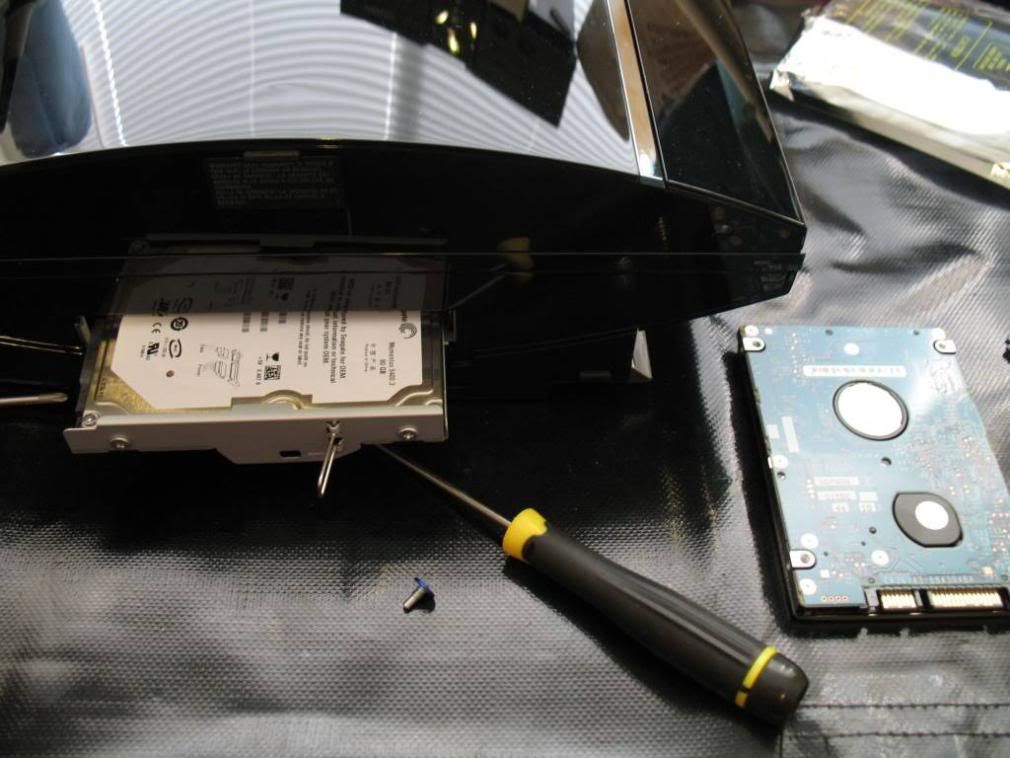
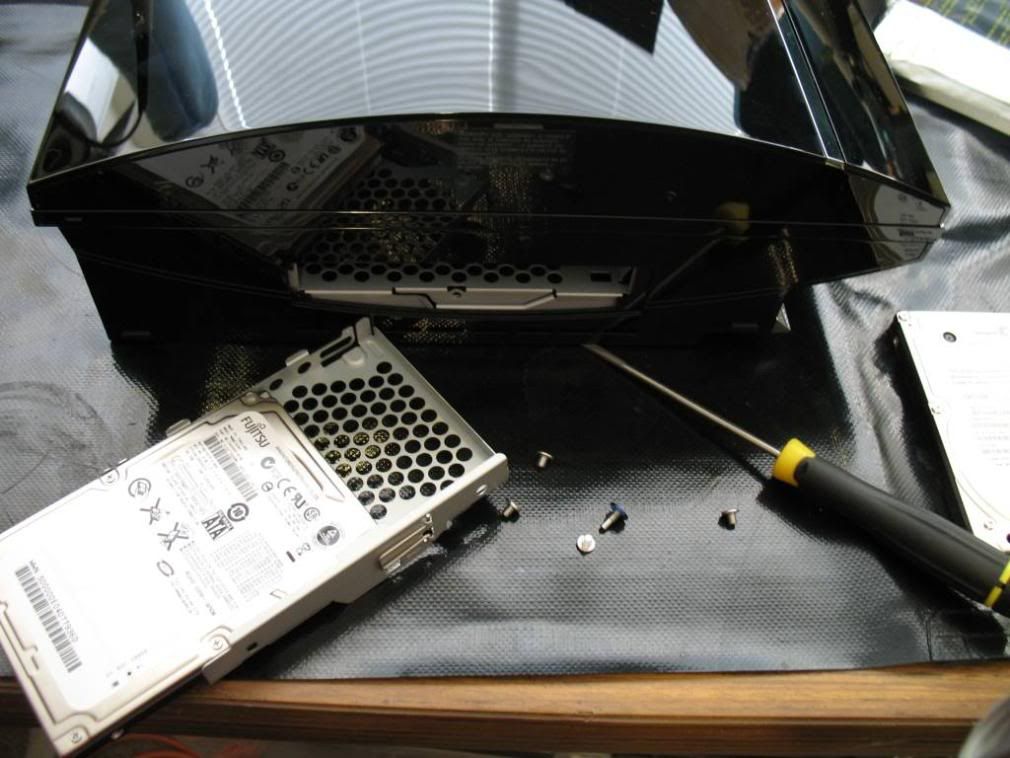
The Sony PS3 HDD uses a SATA 5400RPM drive and it is recommended that you get one that runs at the same speed. Replacing the old HDD is trivial and all you need is a small flat-head screwdriver to pry open the side plastic panel to expose the HDD tray and a #0 Phillip-head driver to remove the retaining screw and the four HDD screws holding it to the tray. Once you have the blue retaining screw out you simply slide the tray forward to un-seat the drive and slide it out, doing the reverse to install the new one.
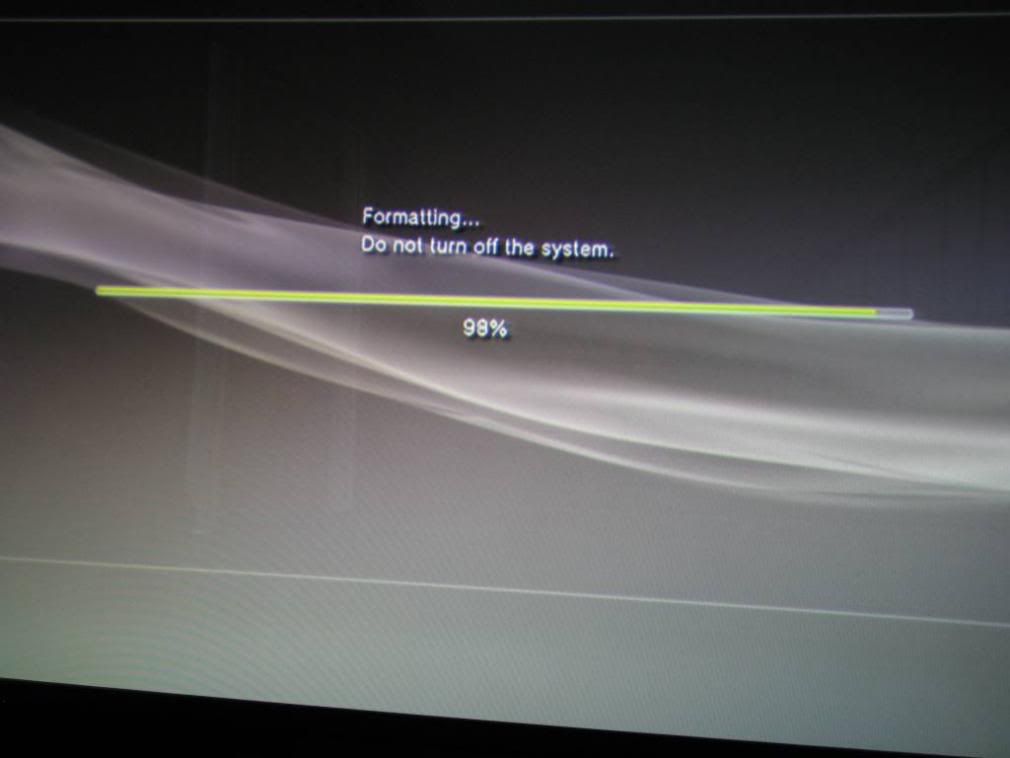
Once that’s done, when you power up the PS3 it will see that somethings changed and will ask you to format the drive. Obviously you will and a few minutes later you will have a monster HDD at your disposal.

Now, I could stop there and have a whole lotta room for downloads and game saves, but I want my PS3 to do more, so I navigated to the system settings and formatted the hard drive (again) to leave just 10GB for the PS3 and the rest for the “Other OS”. Unfortunately, under the current 3.10 version of PS3 firmware you can’t change the partitioning that much – it’s either 10GB for the “Other OS” and the remainder for the PS3 or 10GB for the PS3 and the remainder for the “Other OS” – too bad. If the PS3 were really more of a media center and could handle several more video codecs so that I could stream my video netcasts through it, I wouldn’t bother going through all this.
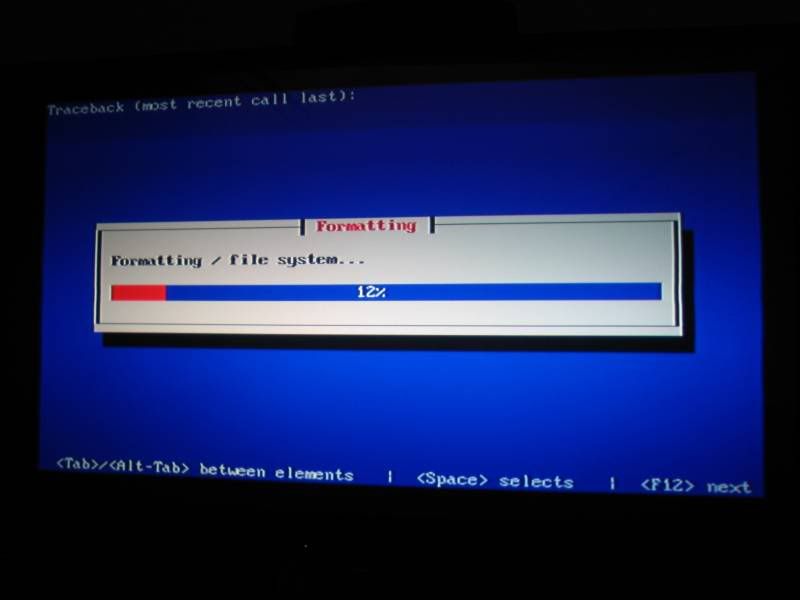
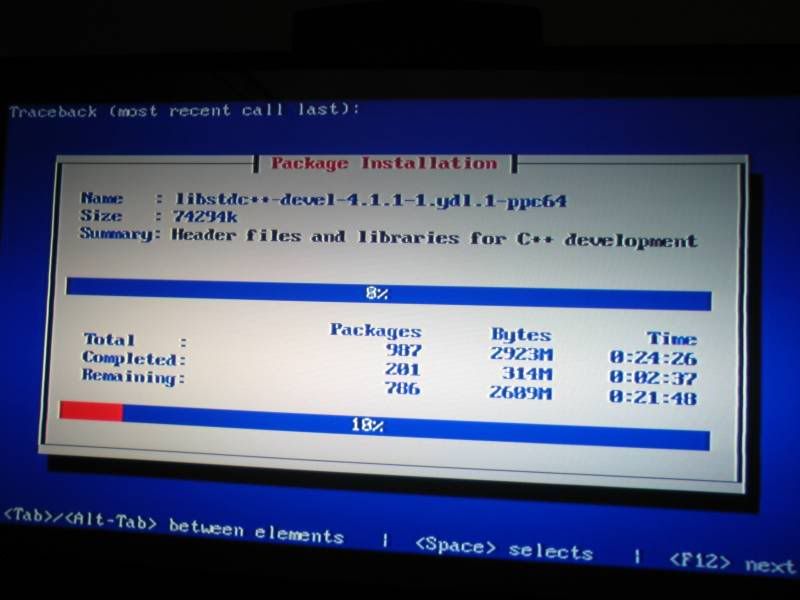
Yellow Dog Linux is a Fedora Linux fork that is built with the PS3 in mind and is fairly mature at this point so it was the only logical choice for this project. I learned the HARD way that this distro was built with 720p displays in mind and as the default resolution. This caused me a lot of frustration as my HD display will only handle 480i, 480p and 1080i, so I searched for a solution since there isn’t an option to easily set it during the initial installation. Luckily, I finally found documentation that others had created detailing how to perform a text installation and then edit the inittab and kboot.conf files to provide for alternate default display resolutions. Although the documentation is about dropping the resolution to accommodate SDTV displays, it can be adapted to any display resolution by reading the options available in the files being edited.
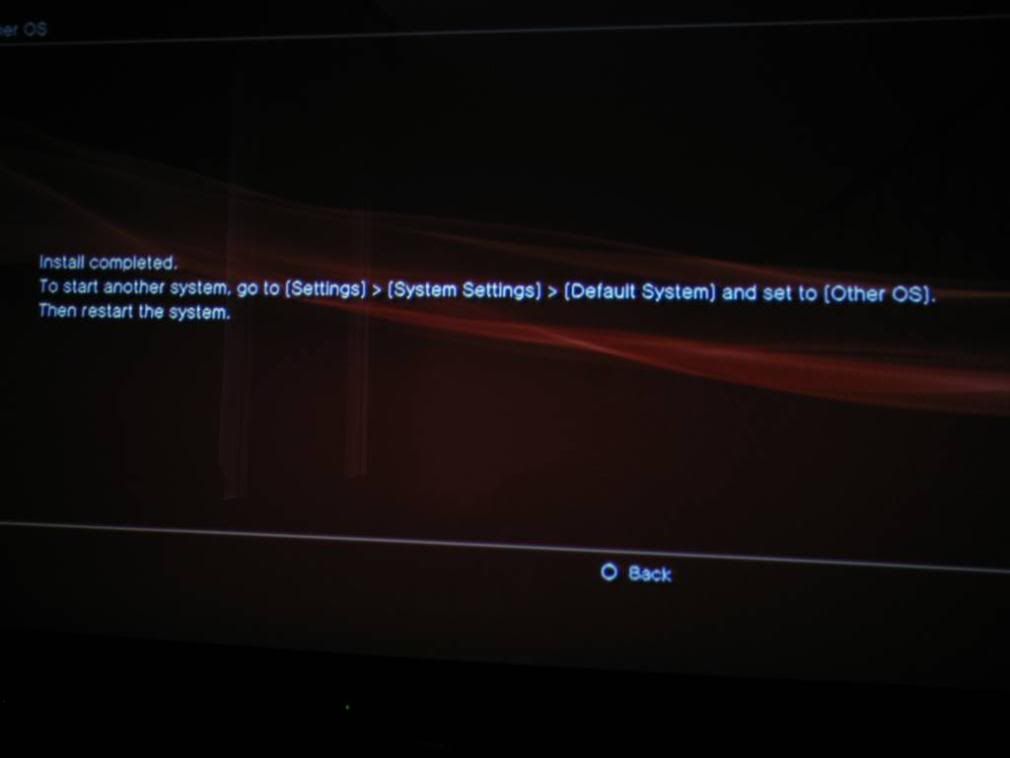
Once I got the ISO DVD burned and loaded I selected the PS3 option to install the alternate OS. Then the Linux kernel loads and at the “kboot” prompt there are only a few seconds where I can type installtext to force the low-res option and keep it from trying to perform a graphical install.
I happened to have a Gyration cordless mouse and keyboard which are essential parts to this OS installation and was able to simply connect the USB receiver from my HDTV PC to the PS3 for this.
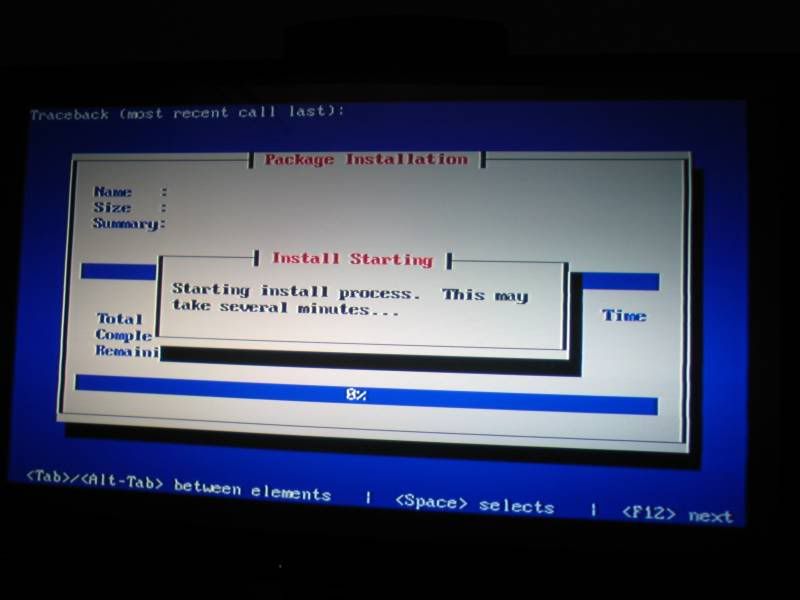
The Linux package installation was easy, but took about 45 minutes…. Go for a drink…. At a bar.
After the install I needed to go back to the low-res documentation to follow a few more steps so it would display on my HDTV. The Wiki steps worked very well and I am able to boot right into YDL at 1080i. Although, I can see where 720p may be the best option if you have it, since the font size is really very small and trying to increase the font, gadget and button size for the desktop theme is very time consuming and not a panacea for ultimate readability. A 1080p display would be better than 1080i, but some of the fonts that can’t be changed are still very small at this resolution – even with a 65″ display like mine.
I’ll provide another post once I have my network drives connected and I have more items set up for regular use.